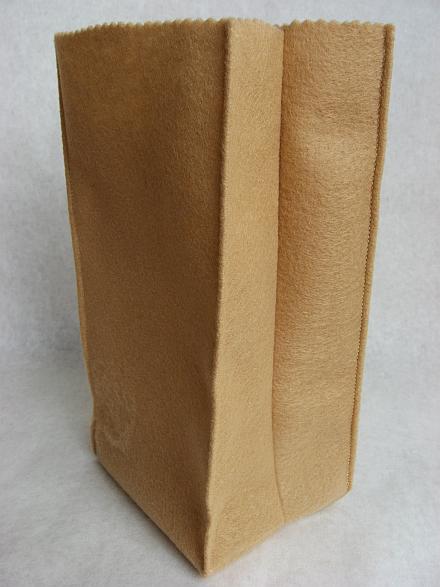
I was recently window shopping and saw some adorable plush vegetables. I think it may have been our freakish winter warm spell that got me thinking vegetables are adorable in the first place, but needless to say, I just LOVED them. I did not, however, love the price so much or have any way to justify buying plush vegetables at all. Suddenly, I remembered seeing some handcrafted play foods on a few blogs I read and the pile of craft felt I had sitting at home in my craft bin. I can certainly justify taking on a new crafting hobby, especially when I already have all the materials I need...
...So I entered the grips of the World Wide Web and did a Google search on free felt play food patterns. I came up with a plethora of websites and blogs containing printable patterns, photo and video tutorials, not to mention other great project ideas! After collecting quite a few ideas, I decided to move forward with making a carrot. I adapted my idea from this online tutorial, but did not include the stitched detail on the orange part and added a face.
 Meet Bet A. Carotene!
 I loved the turnout of this project right away. I already had plenty more ideas, but it was late and I needed to go to bed. Today I continued on with a felt pea pod. I adapted my pattern from two websites. I used the felt peas tutorial on a blog called bread and buttons to get the basic idea for the pod. I wanted more of a refined edging on the pod, so based on the photo shown on The Wool Food Mama blog, I sewed a blanket stitch along the middle edges of the pod. I still liked the idea of having a face on the peas (as shown in that same photo), and decided to use a lighter shade of green felt to make the peas and marker on the face just as with the carrot.
Perhaps now you would also like to fill up that fabulous felt lunch bag with some healthy produce. So, in the spirit of How-to Tuesday on a Thursday, I will share directions for making your own felt carrot and peas in a pod.
Bet A. Carotene
Materials:
Orange craft felt (less than one sheet)
Dark Green craft felt (less than one sheet)
Light pink/beige/cream craft felt for face (less than one sheet)
Dark brown or black fine tipped permanent marker
Scissors
Poly Fiber Fill (or cotton balls work if you don't have poly fiber fill on hand)
Needle & thread (I sew by hand, but you could use a machine if you prefer)
*I also used white thread, but if/when I made additional carrots, I will try using orange thread
Directions:
- Cut out one triangle from the orange felt and two leaf shapes from your dark green felt as shown on the Felt Carrot Tutorial Pattern (pdf file). Cut out a circle/oval from the light pink felt and use your fine tipped marker to draw on a face.
- Fold the orange piece in half lengthwise and sew along the side seam. This is the "wrong" side. Now turn your piece right side out and stuff it firmly leaving about a quarter of an inch at the top.
- Sew around the open end of the carrot using a running stitch and gather it in to the center.
- Attach the leaves to the top. I folded one around the other and stitched them on at the same time, stitching once straight through the leaves to secure them at the center.
- Stitch on the face piece.
Materials:
Dark green craft felt (less than one sheet)
Light green craft felt (less than one sheet)
Scissors
Poly Fiber Fill
needle & green thread
fine tipped black or brown permanent marker
Directions:
- Cut 2 crescent shapes of the same exact size out of your dark green felt. This is most easily done if you fold a piece in half, thus cutting two at the same time. Cut 2 circles (about an inch-and-a-half in diameter) from the light green.
- Place the 2 crescent shapes, one on top of the other, and sew along the outside. This is the "wrong" side. Now fold it right side out and carefully snip the ends with your scissors as will stick out a bit.
- Stitch about an inch in on both ends of the pod leaving the center open. Using green thread and a blanket stitch, sew a finish along the edges of the open part of the pod.
- Use a running stitch to sew around one circle, and placing a small chunk of fiber fill in the center, gather the felt around it into a ball. Stitch up the bottom and you're ready to place your first pea in the pod! I stitched it into the bottom for extra security. Repeat with the second light green circle. Now you're ready to draw on some adorable faces!
 Don't forget your lunch!
I particularly enjoy crafting with felt in this way because it provides instant gratification. None of these projects take very long to make, and even sewing by hand, they are pretty fool proof. Additionally, it is a cost effective hobby! One felt rectangle purchased at a craft and hobby shop runs about 25 to 30 cents. You will have enough felt left over from each color to make multiple projects. Fiber fill is usually under $5 for a 20oz bag, but with such small projects, you could even use unraveled cotton balls for the filling. Even if you do go the fiber fill route, you will get many projects out of one 20oz bag. These little guys would create wonderful gifts for any little chefs or gardeners you may know--and some "big" kids would like them, too!


No comments:
Post a Comment